


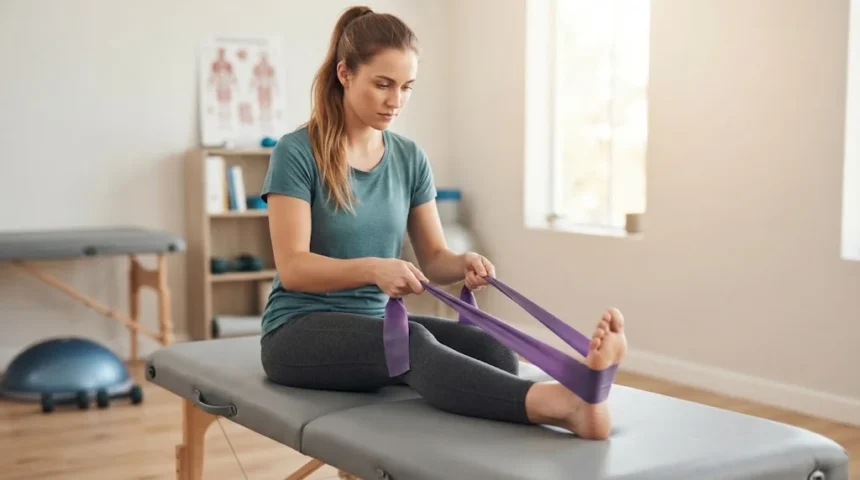
Ankle injuries can make everyday activities such as walking, climbing stairs, exercising, or standing for long periods uncomfortable. Sprains, strains, stiffness, weakness, and reduced balance are common reasons people begin ankle rehabilitation. The right exercises can help restore movement, improve strength, and rebuild confidence after the initial injury has settled.
Ankle rehab should usually progress gradually rather than jumping straight back into demanding activity. Early exercises often focus on mobility and gentle muscle activation, while later stages introduce strengthening, balance, and functional movements. The exact progression depends on the type and severity of the injury, your current symptoms, and how well the ankle tolerates activity.
Good technique matters throughout the recovery process. Exercises should challenge the ankle without causing sharp, worsening, or unstable pain. This guide explains useful ankle rehab exercises, how to perform them correctly, common mistakes to avoid, and practical tips for returning to normal movement safely.
Why Ankle Rehabilitation Matters
An ankle injury can affect more than pain alone. Swelling, stiffness, weakness, and reduced joint awareness may remain after the initial discomfort begins to improve. Without rehabilitation, some people continue to feel unstable or hesitant during walking, running, or quick changes of direction.
Rehab helps restore the ankle’s ability to move and control force. The muscles around the lower leg, foot, and ankle need to work together during every step. Strengthening these structures can make weight-bearing activities feel more secure and may reduce unnecessary compensation elsewhere in the body.
Balance training is also an important part of ankle rehabilitation. After an injury, your ability to sense joint position may temporarily decrease. Practicing controlled balance exercises can help retrain this awareness and improve confidence during everyday movement and exercise.
Start With Gentle Ankle Range-of-Motion Exercises
Early ankle rehab often begins with gentle movement rather than heavy resistance. One simple exercise is ankle circles, where you slowly move the foot through a comfortable circular path. Keep the movement controlled and avoid forcing the ankle into painful positions.
Another useful drill is ankle alphabet writing. Sit or lie down with the leg supported and imagine drawing letters in the air with your toes. This encourages movement in several directions while keeping the exercise low impact.
Range-of-motion exercises should feel smooth rather than aggressive. Mild stiffness is common, but sharp pain is a reason to reduce the movement. Performing these drills several times throughout the day may help gradually restore comfortable ankle motion.
Try Ankle Pumps for Mobility
Ankle pumps are one of the simplest exercises for early rehabilitation. Sit or lie down with the leg supported and slowly point your toes away from you. Then pull the toes back toward your shin as far as feels comfortable.
This movement encourages the ankle to move through plantar flexion and dorsiflexion. It can also activate the calf and muscles at the front of the lower leg without placing much weight through the joint. Slow repetitions usually work better than fast, bouncing movements.
Start with ten to fifteen repetitions and repeat as tolerated. Focus on moving through a comfortable range rather than trying to force the foot farther each time. If swelling or pain noticeably increases afterward, reduce the number of repetitions or range.
Use Towel Stretches for Calf Flexibility
A towel stretch can help improve calf flexibility when the ankle feels stiff. Sit with the injured leg extended and loop a towel around the ball of the foot. Gently pull the towel toward you while keeping the knee relatively straight.
You should feel a stretch along the calf and possibly around the back of the ankle. Hold the position for around twenty to thirty seconds while breathing normally. Avoid pulling hard enough to create sharp pain.
This stretch can be especially useful when limited calf flexibility makes it difficult to bring the shin forward over the foot. Repeat two or three times as tolerated. Flexibility work should feel controlled and should not leave the ankle more painful afterward.
Add Calf Raises for Strength
Calf raises help strengthen the muscles that control the ankle during walking, climbing stairs, and pushing off the ground. Begin by standing with both feet flat and holding a counter or chair for support. Slowly rise onto the balls of your feet and then lower your heels with control.
Start with both legs working together before progressing to single-leg calf raises. The two-leg version reduces the amount of weight placed through the recovering ankle. Once strength improves, you can gradually shift more weight toward the injured side.
Aim for eight to fifteen controlled repetitions depending on your ability. Avoid bouncing quickly through the movement. Slow lowering is especially useful because it challenges the calf muscles while helping improve ankle control.
Practice Toe Raises for Front-of-Ankle Strength
Toe raises strengthen the muscles along the front of the lower leg. Stand with your heels on the floor and lift the toes upward while keeping the rest of the foot grounded. Use a wall or stable surface if balance is difficult.
These muscles help control the foot during walking and can support better ankle mechanics. Weakness in this area may make it harder to lift the foot smoothly during each step. Controlled toe raises provide a simple way to rebuild strength without complicated equipment.
Perform ten to fifteen repetitions and pause briefly at the top. Focus on lifting the toes without leaning your whole body backward. As the exercise becomes easier, you can increase repetitions or perform it more slowly.
Strengthen the Ankle With Resistance Bands
Resistance bands are useful for rebuilding ankle strength in several directions. Secure the band and move the foot against resistance through plantar flexion, dorsiflexion, inversion, or eversion. Each movement targets slightly different muscles around the ankle.
Begin with light resistance and a small, controlled range. The ankle should move while the rest of the leg remains relatively still. If the knee or hip twists significantly, reduce the resistance and focus on isolating the ankle movement.
Complete approximately ten to fifteen repetitions in each direction. The goal is steady muscle engagement rather than maximum effort. Resistance can be increased gradually once you can perform every repetition with good control and without increased pain.
Improve Balance With Single-Leg Standing
Single-leg standing is an important ankle rehab exercise because it challenges stability and joint awareness. Stand near a counter or wall and lift the uninjured foot slightly from the floor. Try to remain balanced on the recovering ankle for several seconds.
Use your hands for support as much as needed. Over time, gradually reduce how much support you use. The goal is to improve control without creating repeated near-falls or excessive wobbling.
Once basic balance becomes easier, you can increase the challenge by holding the position longer or turning your head gently. More advanced variations may include standing on a softer surface. Progress gradually and prioritize safety throughout the exercise.
Add Heel-to-Toe Walking
Heel-to-toe walking can improve balance and coordination during ankle rehabilitation. Walk forward slowly by placing the heel of one foot directly in front of the toes of the other. Imagine walking along a narrow straight line.
Keep your steps small and controlled. Use a wall or counter nearby if you feel unsteady. Avoid rushing because the exercise is intended to challenge balance rather than speed.
Try several passes across a safe, uncluttered space. As coordination improves, you may increase the distance slightly. This exercise can help prepare the ankle for more complex everyday movement after basic strength has returned.
Try Step-Ups for Functional Strength
Step-ups help bridge the gap between simple rehab exercises and everyday activities. Start with a low step and place the recovering foot fully on the surface. Press through that foot to lift your body upward, then lower yourself carefully.
Keep the knee aligned over the foot rather than allowing it to collapse inward. Move slowly enough that the ankle remains stable throughout the exercise. Holding a railing or support can make the movement safer initially.
Begin with a low height and a small number of repetitions. As strength and confidence improve, you can gradually increase the step height or repetitions. Step-ups are especially useful because they resemble climbing stairs and other common daily movements.
Use Mini Squats to Rebuild Lower-Body Control
Mini squats train the ankle, knees, hips, and legs to work together. Stand with your feet about hip-width apart and hold a stable surface if needed. Bend your knees slightly while keeping your heels on the ground, then return to standing.
The movement does not need to be deep. A shallow squat can still challenge ankle mobility and lower-body control. Keep your weight distributed evenly and avoid shifting completely away from the recovering side.
Perform eight to twelve slow repetitions. Stop if the ankle feels unstable or pain increases significantly. As control improves, you can gradually increase squat depth and reduce hand support.
Progress to Lateral Movements
Side-to-side movement is an important part of later ankle rehabilitation. Begin with gentle lateral weight shifts, moving your body weight from one foot to the other. Keep both feet planted and focus on controlling the transfer.
You can later progress to small side steps or banded lateral walks. These movements challenge the ankle to stabilize while the body moves sideways. They also involve the hips and knees, helping restore whole-leg coordination.
Lateral drills should be added only after basic walking and balance feel comfortable. Avoid sudden cutting movements too early in recovery. Progress should move from controlled stepping to faster directional changes only when the ankle feels stable.
Pay Attention to Other Sources of Pain During Rehab
Not every discomfort that appears during ankle rehabilitation comes from the ankle itself. Changes in walking can sometimes place extra stress on the knee, hip, or lower back. This is especially common when someone limps or avoids putting weight through the injured side.
If pain develops elsewhere, avoid automatically assuming it is part of normal ankle recovery. For example, UTI lower back pain can have a completely different cause from exercise-related soreness. Understanding the source of pain helps prevent unrelated symptoms from being mistaken for a rehabilitation issue.
Try to return to a natural walking pattern as the ankle improves. If limping continues even after pain decreases, additional mobility or strengthening work may be needed. Persistent pain in another area should be evaluated independently rather than treated only through ankle exercises.
Know When to Progress Your Exercises
Progression should be based on how the ankle responds rather than a fixed schedule. If an exercise becomes easy and does not cause increased pain or swelling, you may be ready for a slightly greater challenge. This could mean adding repetitions, resistance, or more complex movement.
Avoid increasing several variables at once. Adding more resistance, longer sessions, and harder balance drills on the same day can make it difficult to know what caused a flare-up. Change one factor at a time and observe how the ankle responds.
A small amount of muscle fatigue is normal, but worsening swelling or sharp pain is not. Progress should feel challenging yet manageable. Returning too quickly to running, jumping, or sport-specific activity can increase the risk of another setback.
Common Ankle Rehab Mistakes
One common mistake is doing too much too soon. Pain may decrease before strength, balance, and joint control fully return. Jumping straight back into demanding exercise can place more stress on the recovering ankle than it is ready to handle.
Another mistake is focusing only on stretching. Mobility matters, but ankle rehabilitation should also include strengthening and balance exercises. A flexible ankle that remains weak or unstable may still feel unreliable during walking or sports.
Ignoring the rest of the leg can also slow progress. The calf, knee, hip, and core all contribute to lower-body movement. A complete rehabilitation program should gradually restore strength and control throughout the entire movement chain.
When to Seek Professional Help
Professional assessment is useful if you cannot bear weight, swelling remains severe, or pain does not improve over time. Significant bruising, visible deformity, or a history of major trauma may indicate an injury that needs more than home exercise.
You should also seek evaluation if the ankle repeatedly gives way or feels unstable despite rehabilitation. Persistent numbness, tingling, or weakness can also suggest that nerves or other structures may be involved. These symptoms should not simply be pushed through.
A physiotherapist or other qualified healthcare professional can assess mobility, strength, balance, and movement patterns. They can also provide a more personalized progression based on the type of injury. Individual guidance is especially helpful when returning to running, jumping, or competitive sports.
Conclusion
Ankle rehab exercises can help restore mobility, strength, balance, and confidence after an injury. Early exercises such as ankle pumps, circles, and gentle stretches can improve movement, while later strengthening drills prepare the ankle for more demanding activities.
Progress gradually from simple range-of-motion work to calf raises, resistance-band exercises, balance drills, step-ups, and functional movements. Good technique matters more than completing large numbers of repetitions. The ankle should feel increasingly stable rather than repeatedly irritated after exercise.
Listen to your symptoms and avoid rushing back into high-impact activity. Persistent swelling, instability, numbness, or severe pain deserves professional assessment. A steady rehabilitation plan can help you rebuild ankle function and return to normal movement more confidently.
FAQs
What are the best exercises for ankle rehabilitation?
Useful ankle rehab exercises include ankle pumps, calf raises, resistance-band movements, single-leg balance, step-ups, and controlled squats. The best choices depend on your injury and recovery stage.
How often should I do ankle rehab exercises?
Gentle mobility exercises may be performed regularly, while strengthening and balance work often need recovery between sessions. Frequency should depend on symptoms, exercise intensity, and professional guidance when available.
How long does ankle rehabilitation take?
Recovery time varies with injury severity and individual progress. Mild injuries may improve within weeks, while more significant sprains or other conditions can require several months of progressive rehabilitation.
Should ankle rehab exercises hurt?
Mild muscular effort or stiffness can be normal, but sharp or worsening pain is a reason to stop or modify the exercise. Rehabilitation should challenge the ankle without significantly aggravating symptoms.
When can I start running again after an ankle injury?
Running should usually return after walking, strength, balance, and basic functional exercises feel comfortable. The ankle should tolerate impact and directional movement without instability or significant pain before running intensity increases.